Adding or Editing a Dish to include a second language

There are several structures for a dish name which affects how "Web Orders Printer" prints the kitchen ticket.
In general, the structure of a dish name is made up of the dishcode, English name and the Chinese name all separated by a separator such a full stop ".", for example, "1. Mixed Hor D'oeuvres (For 2). 前菜拼盤 (2人)". 
The structure for "Choices & Addons" & "Size" is different where no code is needed, the names in the two languages are separated by a full stop "." too. 

Edit Dishname

To add a second language or Chinese dish name, simply go to "Menu Setup".
Select the dish you wish add Chinese name to.
Click Edit.
Enter a full dot "." after the English dish name then enter the Chinese Name. Click "Save" button to save.
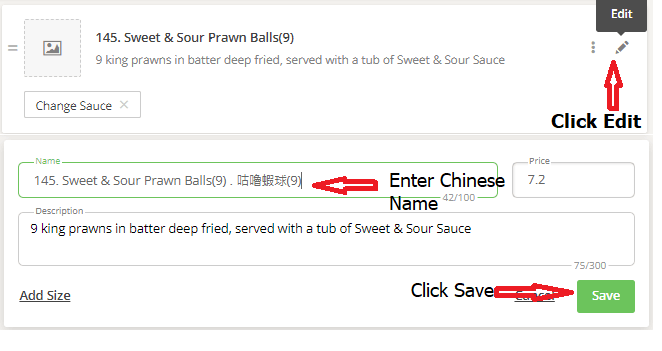
enter dish Chinese name

Addons

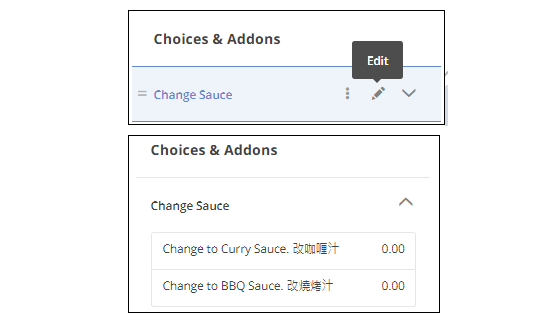
The name of Choices & Addons (in this case it is "Change Sauce") does not require a second language, but the entry requires a second language separated by a full stop "." as shown , the "Web Orders Printer" will prints the dish name and addon separately on two lines. 

Addon

Choices

For a dish with multiple choices, it is necessary to add the dish code in front of the choice's name such as "263. Chicken. 雞肉" for dish     ". Fried Ho Fun with. 炒河", the "Web Orders Printer" will combine the dish name and prints the dish name & the choice on one line.

Choices

Concatenate Dishname & Choices

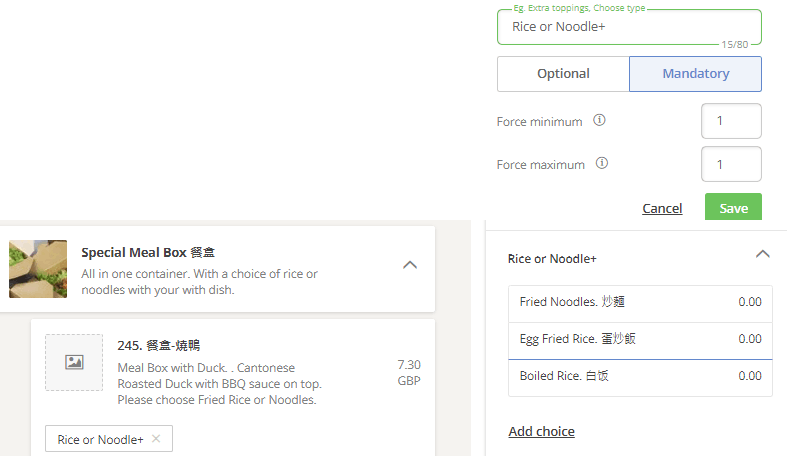
It is possible to "concatenate" dish name with the mandatory choice!
Just a "+" sign at the end of the Choice's name and "Web Orders Printers" will concatenates the dish name with choice and prints on one line! 
In this example , Meal Box with Duck with Egg Fried Rice 餐盒-燒鴨 蛋炒飯

Concatenate

Set Meal

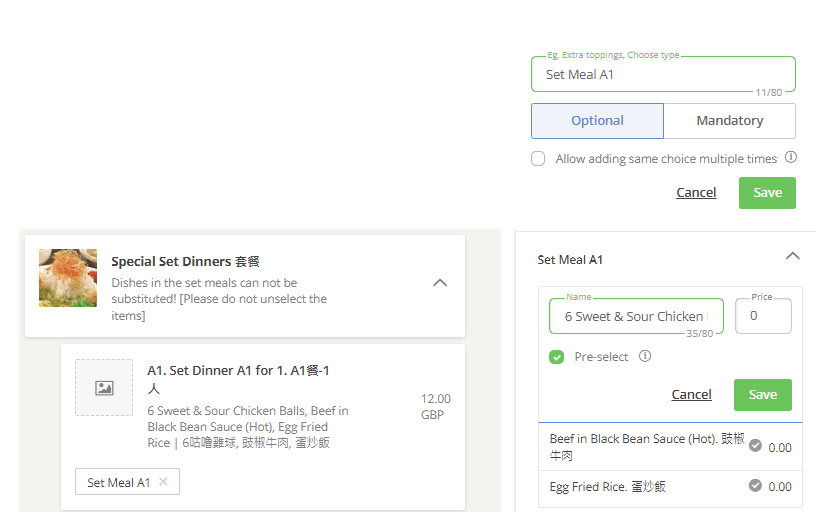
For Set Meal, the setting must be set to "Optional" as shown and each sub dishes for that set meal is an Addon and each must be "Pre-select"ed as shown.
The "Web Orders Printer" will print each of the sub dishes after the name of the set meal.
Set Meal

Adding Integrations

Enable Custom Integration

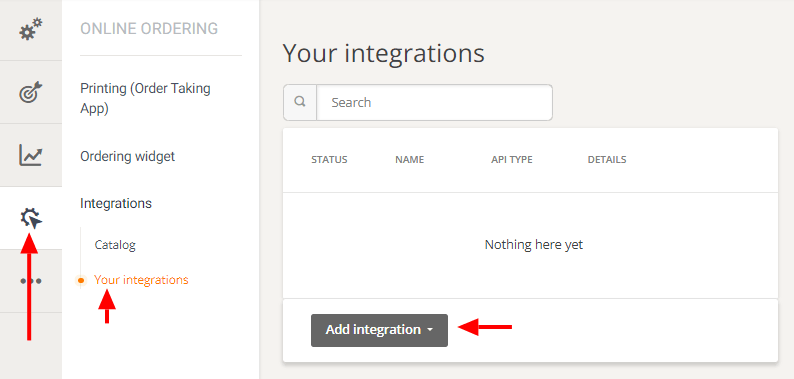
Step 1. Log on to your account. Click "Online Ordering" then "Your integrations" then click button "Add Integration".
From the open box click "Custom integration".

Enable Custom Integration

Filling In The Data

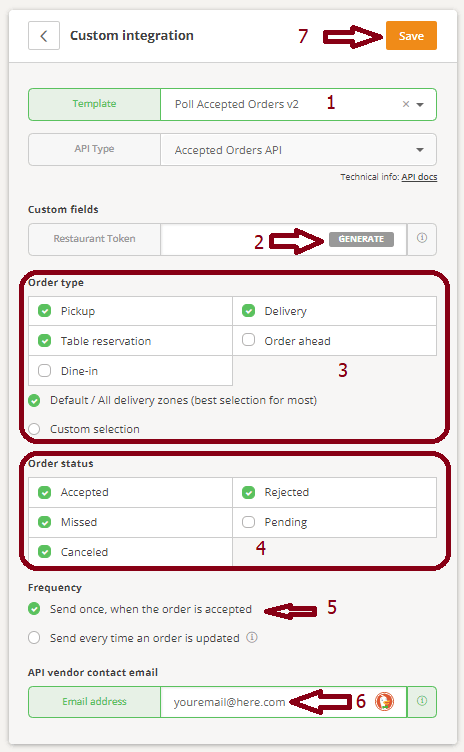
1. Choose "Poll Accepted Orders API"
2. Click "Generate" Button for Restaurant Token
3.Select the appropriate "Order Type", for takeaways select delivery & pickup.
For restaurant also click Table reservation.
4. Select the appropriate "Order Status" that you wish to receive.
5. Select Frequency
6. Enter the vendor contact email.
7. Click "Save" button to save details.

Custom Integration

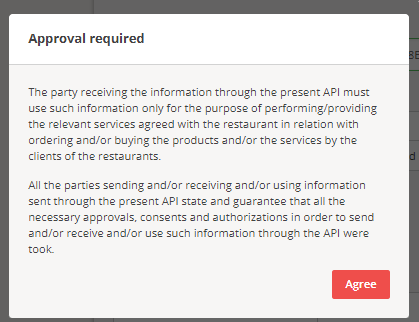
Approval required

Read the information and click "Agree" button.

custom intregration

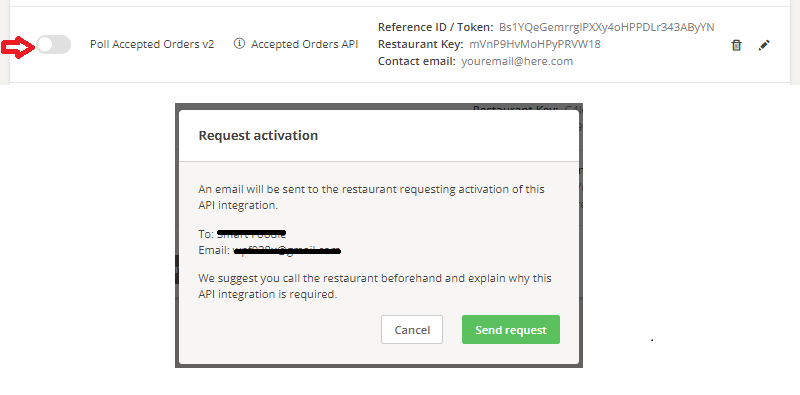
Activation Request

Custom Integration final data, an unique "Restaurant Key" a produced, please note this key, it is required for the Printer App.
Switch on the integration, an email "Request activation" will be sent to the owner of the account to request activation. 
Once the request is accepted, the GloriaFood account is ready for Orders Printer app.

custom integration
The Company
  • Smart EPOS Solutions Ltd
  • 85 High Street, Tunbridge Wells
  • Kent TN1 1XP
  • info@webordersprinter.co.uk
Contact Us
The App
  • Web Orders Printer is a product of Smart EPOS Solutions Ltd design for Gloria Food Online Ordering System.